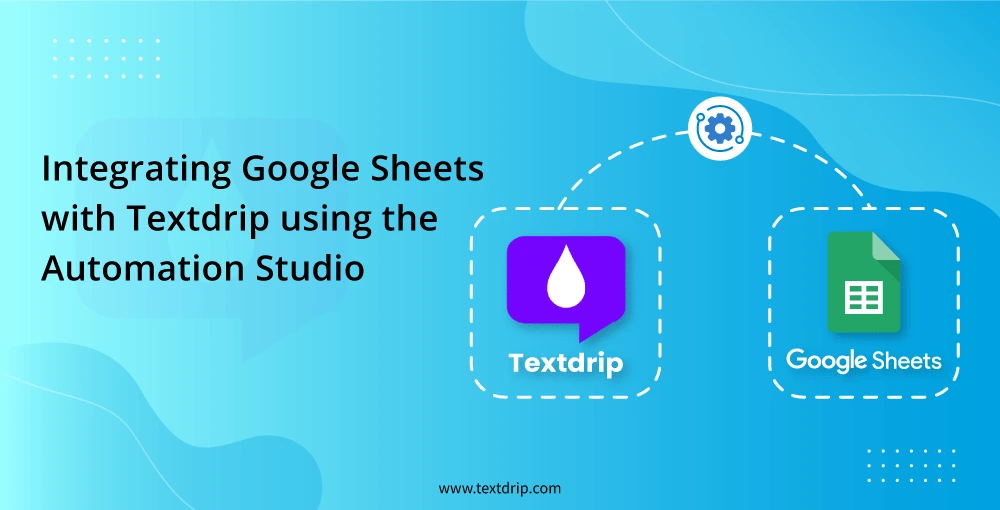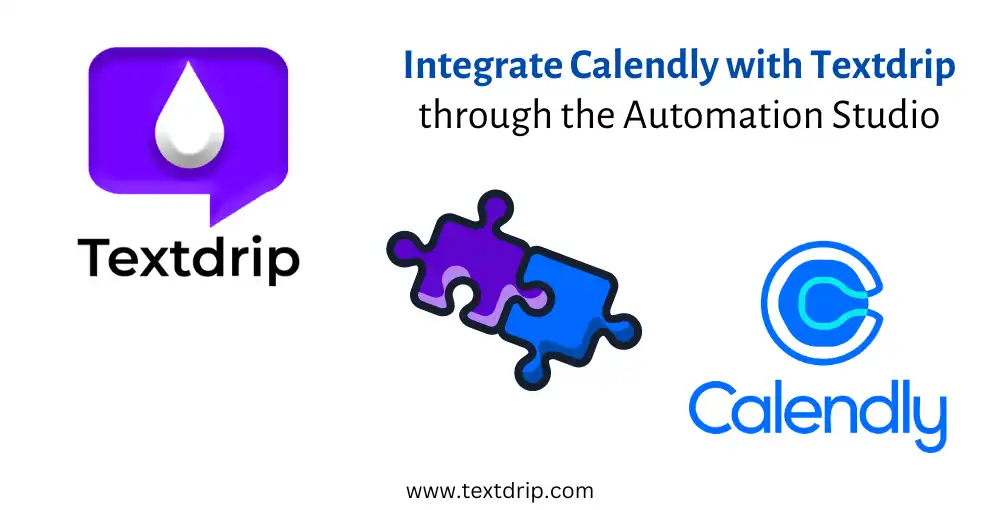
Integrate Calendly with Textdrip through the Automation Studio

19 July 2024

Dhaval Gajjar
In this tutorial, we will explain the step-by-step procedure to integrate Calendly with Textdrip through the Automation Studio feature.
This integration enables you to automate the process of sending appointment-related notifications via SMS. With this setup, you can seamlessly send automated SMS notifications for appointment confirmations, reminders, and scheduling updates that enhance your efficiency and ensure timely communication with your clients.
Follow the steps below to set up this integration and streamline your appointment management.
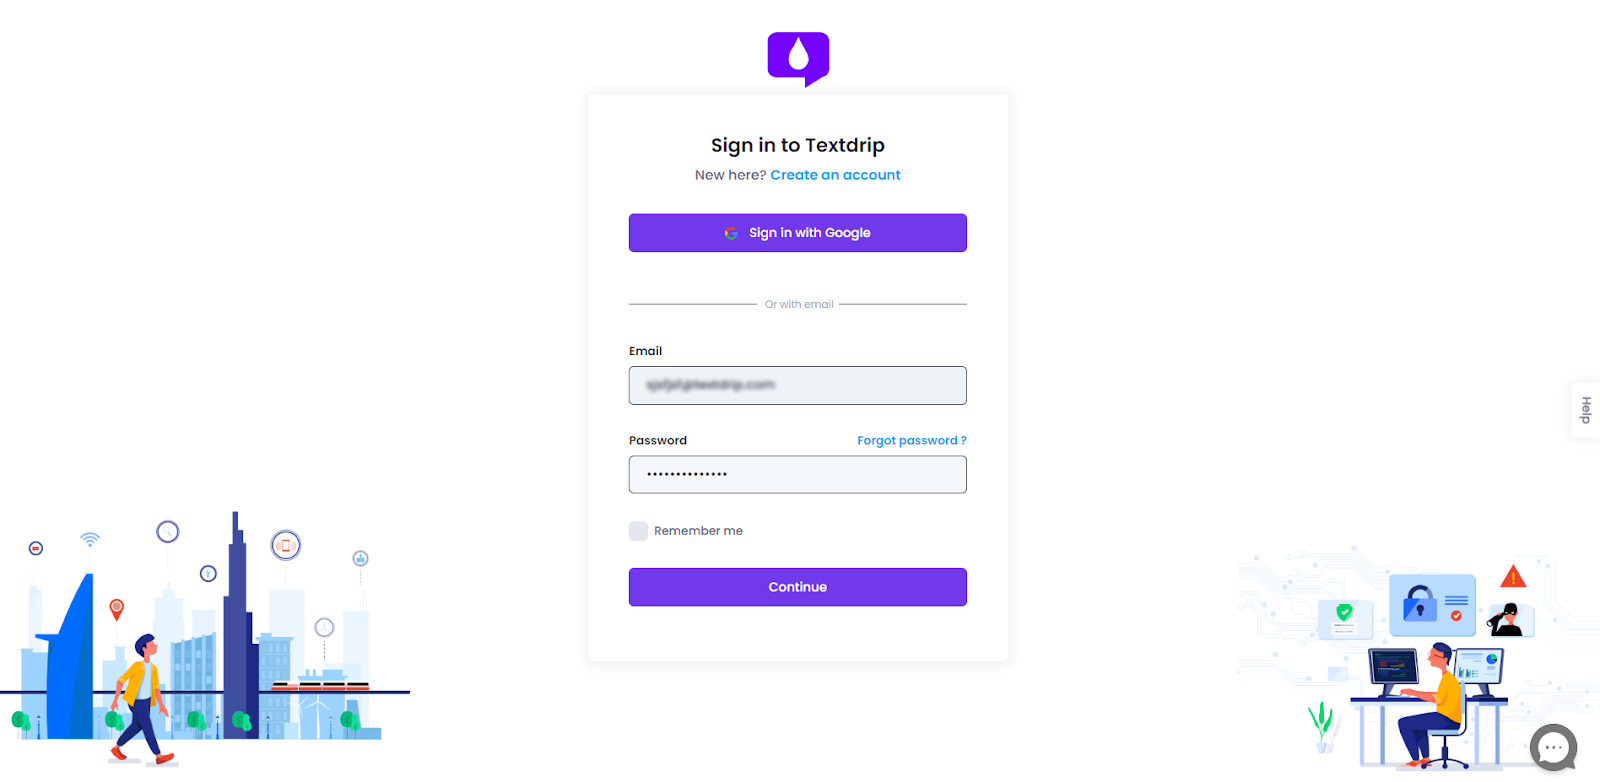
Step 1. Login to Textdrip Account with Credentials
Open your web browser and go to app.textdrip.com. Enter your login credentials (Email and password). You can also log in with your existing Google account.
Click on the “Continue” button to access your Textdrip account.
Step 2: Access Automation Studio
After logging in with your credentials, you will be directed to the main dashboard of Textdrip. On the left side of the dashboard, you will see a panel with various features and options.
Look for the "Automation Studio" option in the left-side panel, typically found under the main "Integrations" feature. Click on "Automation Studio" to proceed with setting up the integration with Calendly.
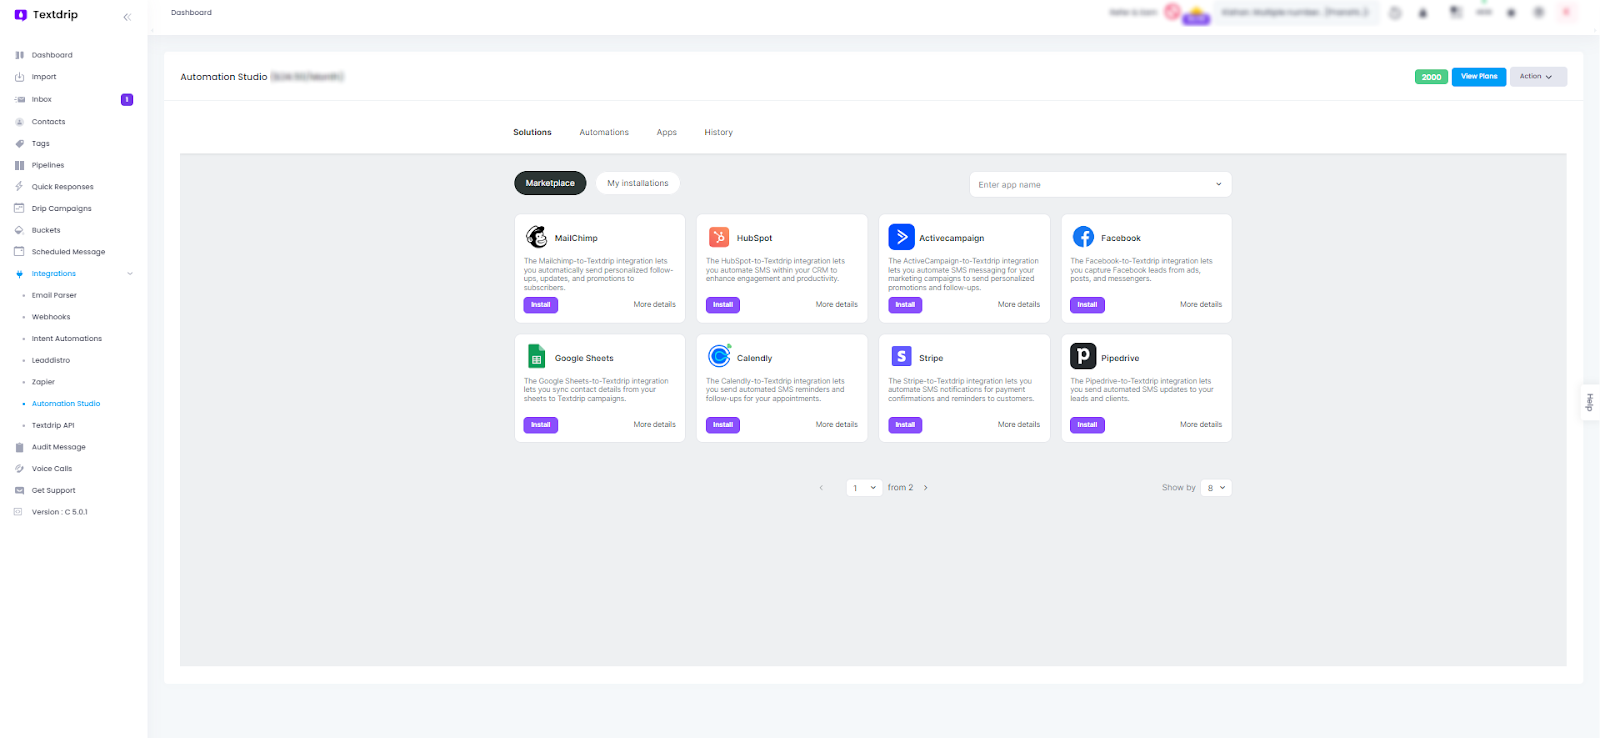
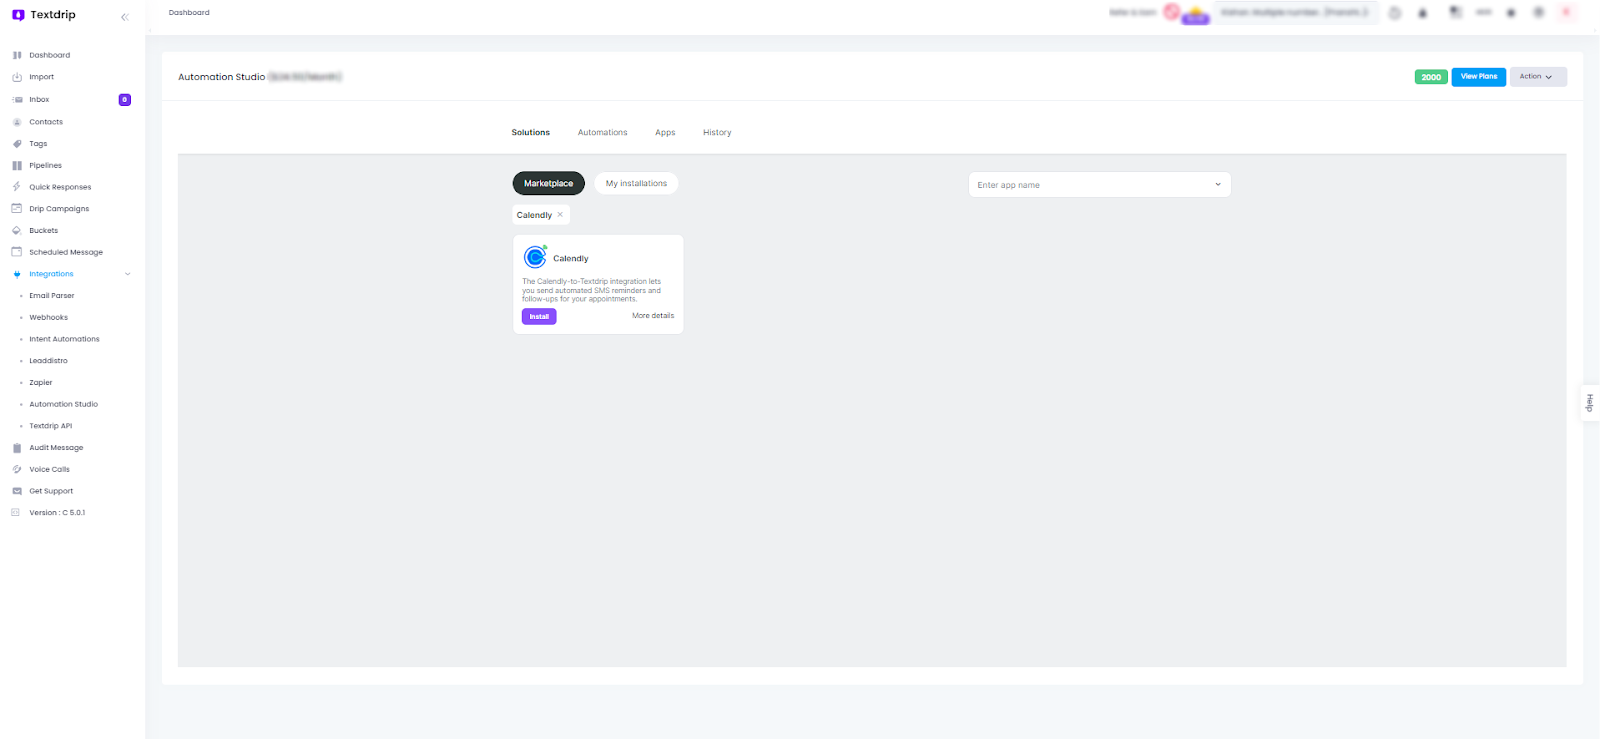
Step 3: Find and Select Calendly Integration
By clicking on "Automation Studio" you will be presented with various application integration options. Look for the search bar within the Automation Studio interface, typically located at the top right or prominently on the page.

Click on the search bar and type "Calendly" to find the integration option. Once Calendly appears in the search results, click on “Install” to proceed with the integration setup.
Step 4: Configure Automation Scenarios
In this step, you'll configure various scenarios to determine when automated SMS messages should be sent based on different appointment-related situations. You have the following options:
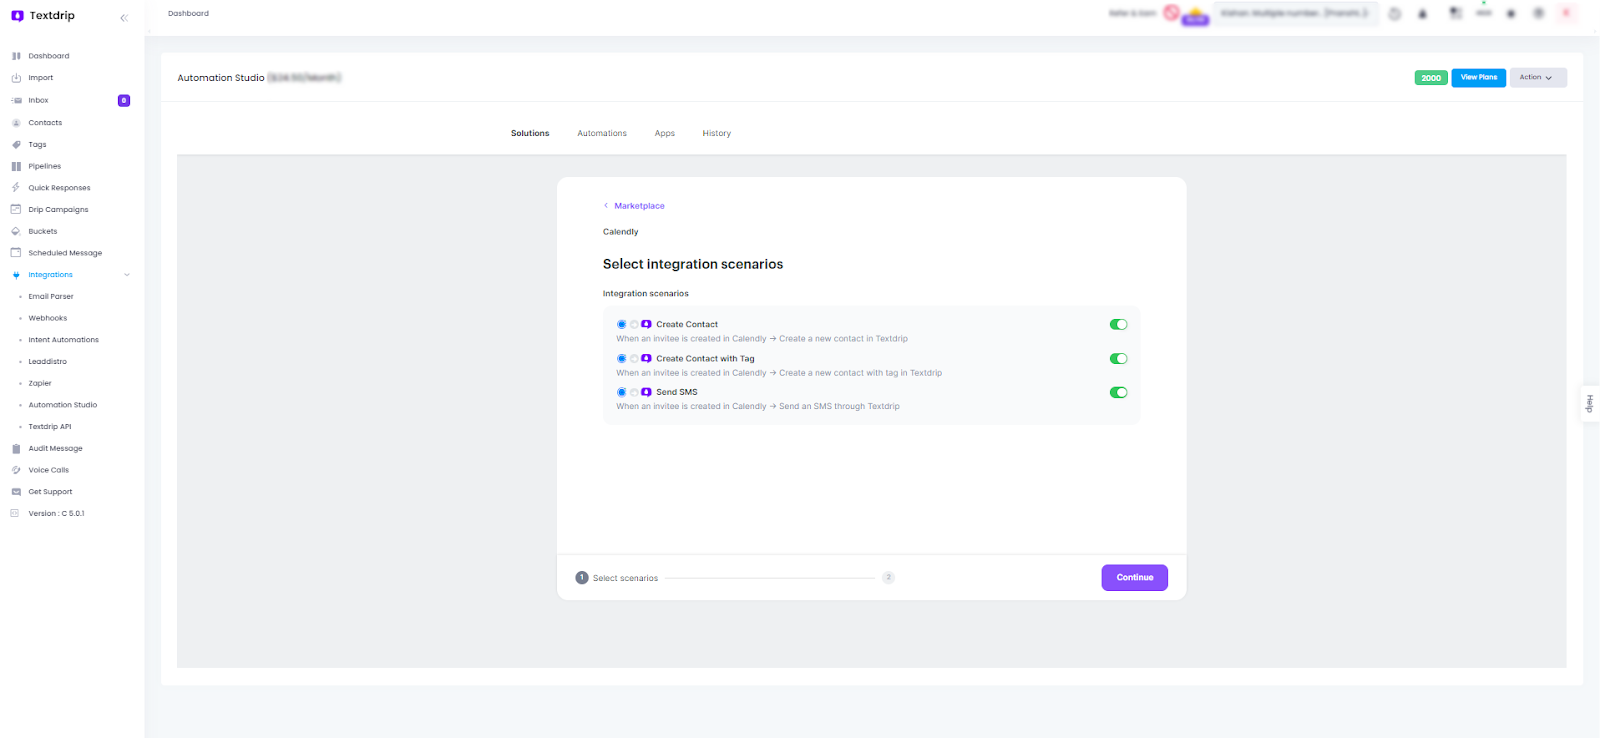
Scenario 1.
- Create Contact: Selecting this option automatically creates a new contact in Textdrip whenever a new invitee is added in Calendly.
- Scenario: When an invitee is created in Calendly
- Action: Create a new contact in Textdrip
Scenario 2.
- Create Contact with Tag: this option not only creates a new contact in Textdrip but also assigns a specific tag to that contact based on the invitee's details in Calendly.
- Scenario: When an invitee is created in Calendly
- Action: Create a new contact with a tag in Textdrip
Scenario 3.
- Send SMS: Choosing this option triggers the sending of an automated SMS through Textdrip whenever a new invitee is created in Calendly. You can aslo customize the SMS content to include appointment scheduling updates, reminders, or confirmations.
- Scenario: When an invitee is created in Calendly
- Action: Send an SMS through Textdrip
By choosing the right scenario based on your preference, click on “Continue”
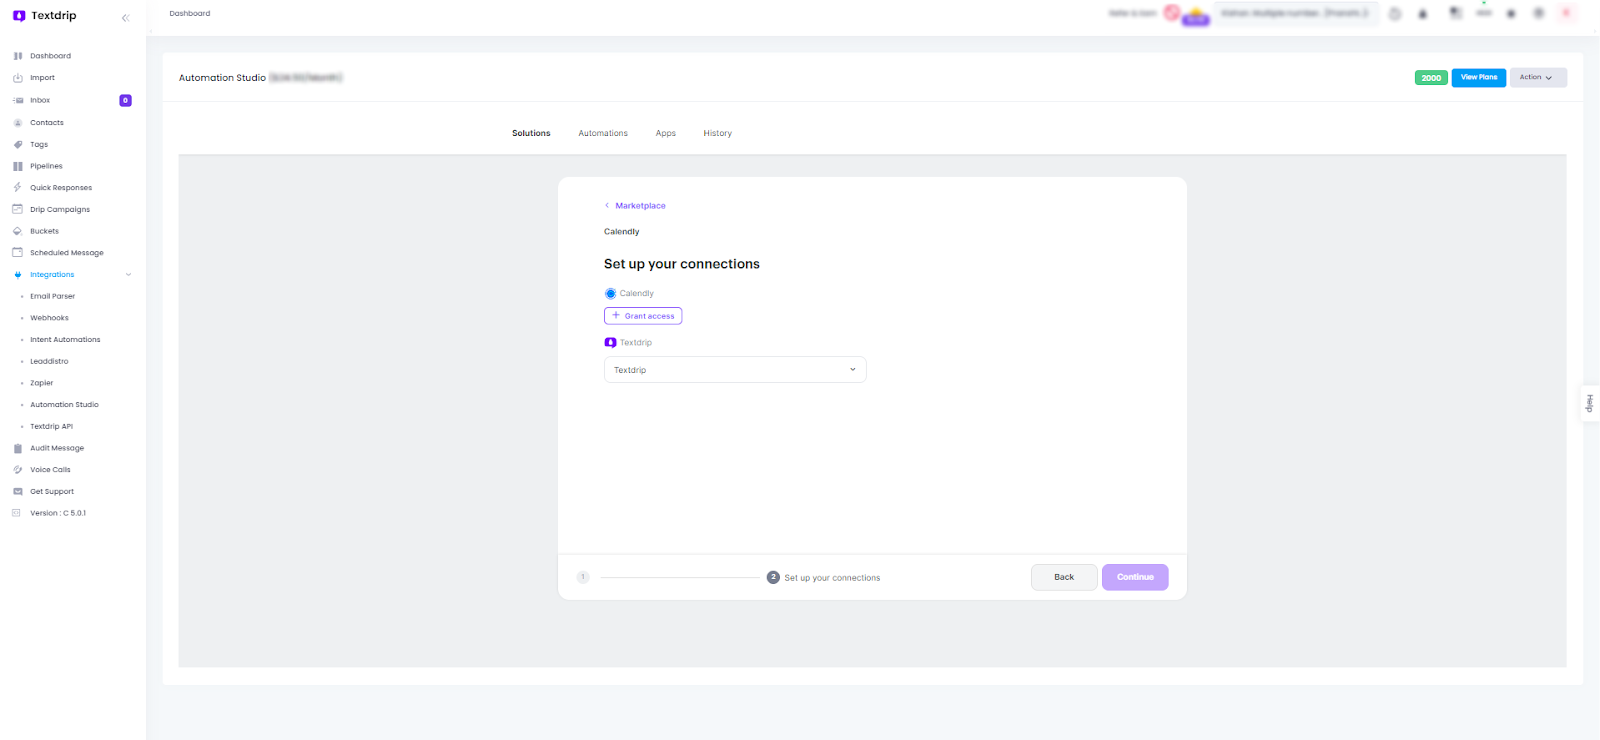
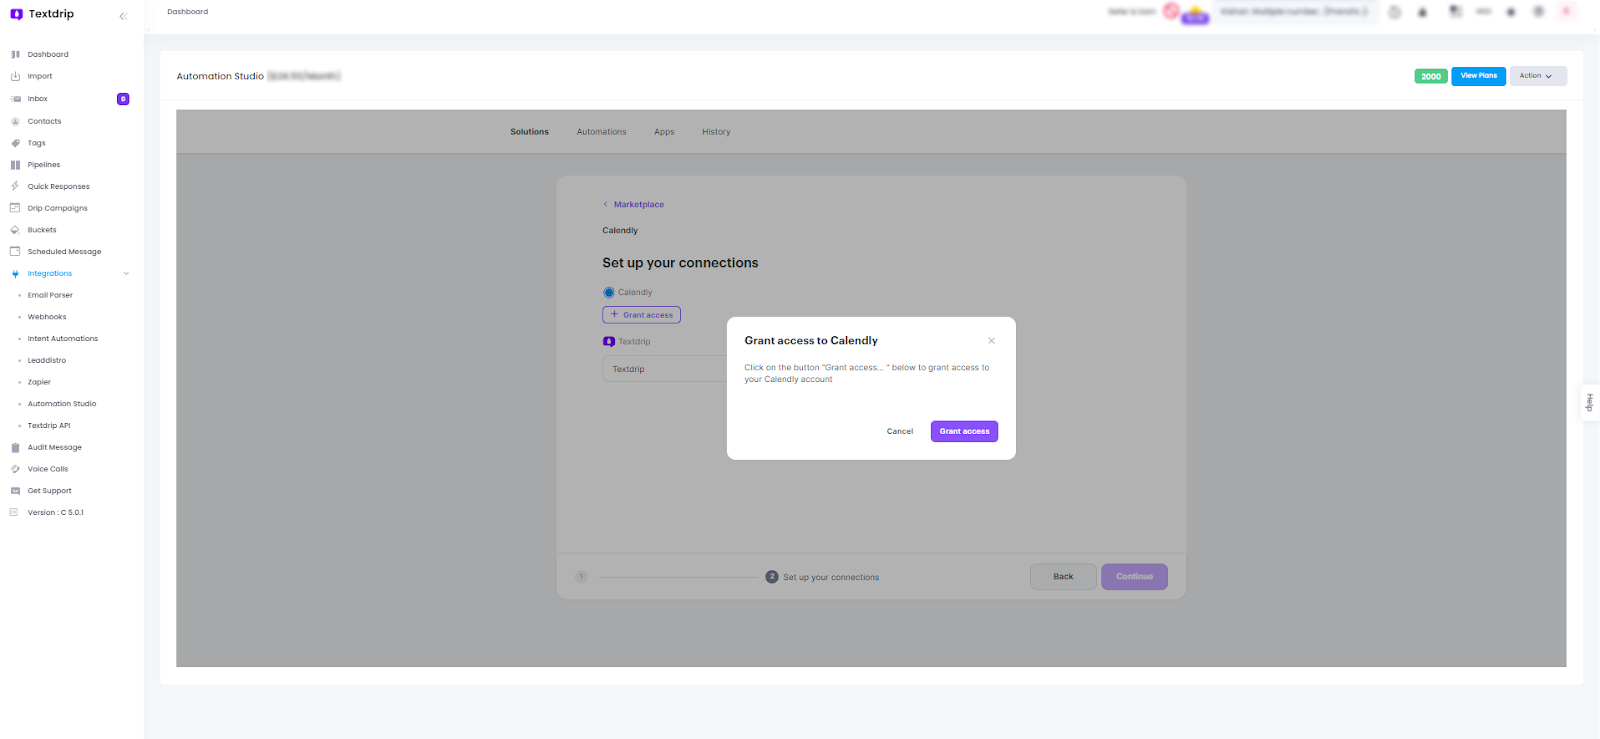
Step 5. Set Up Connection with Calendly
To set up your connection with Calendly, click on the “Grant Access” button.
A new popup window will appear. In this popup, you need to create a unique name for your connection.
(Tip: Use a distinct name to avoid confusion, especially if you plan to set up multiple connections. You can change this name later if needed.)
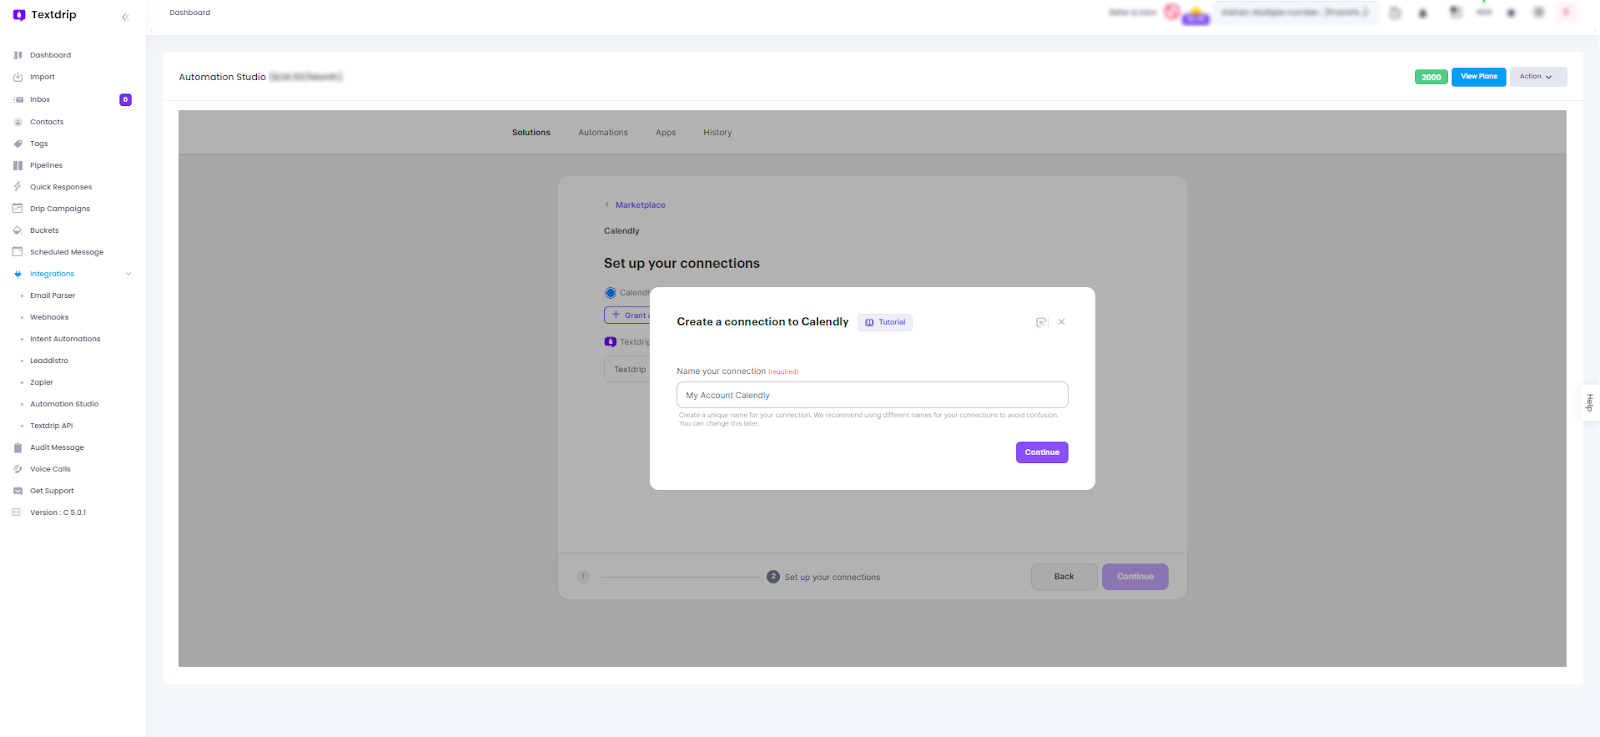
After entering a unique name for the connection, click on “Continue” to proceed with the setup.
Step 6. Confirm and Complete the Connection
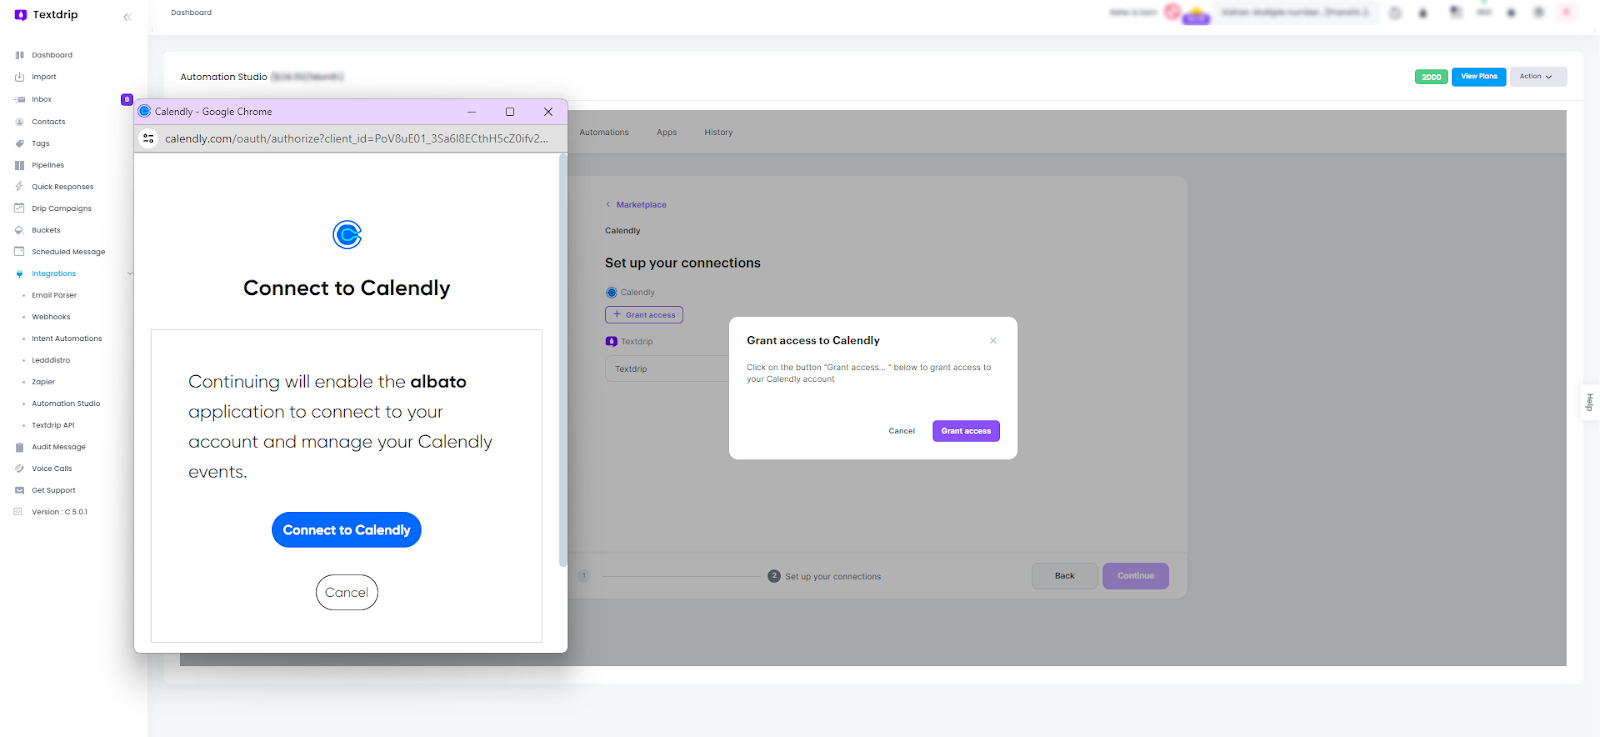
A final pop-up window will appear to confirm that you want to grant access to your Calendly account. Review the details and ensure you want to proceed. Click on “Grant Access” to confirm.
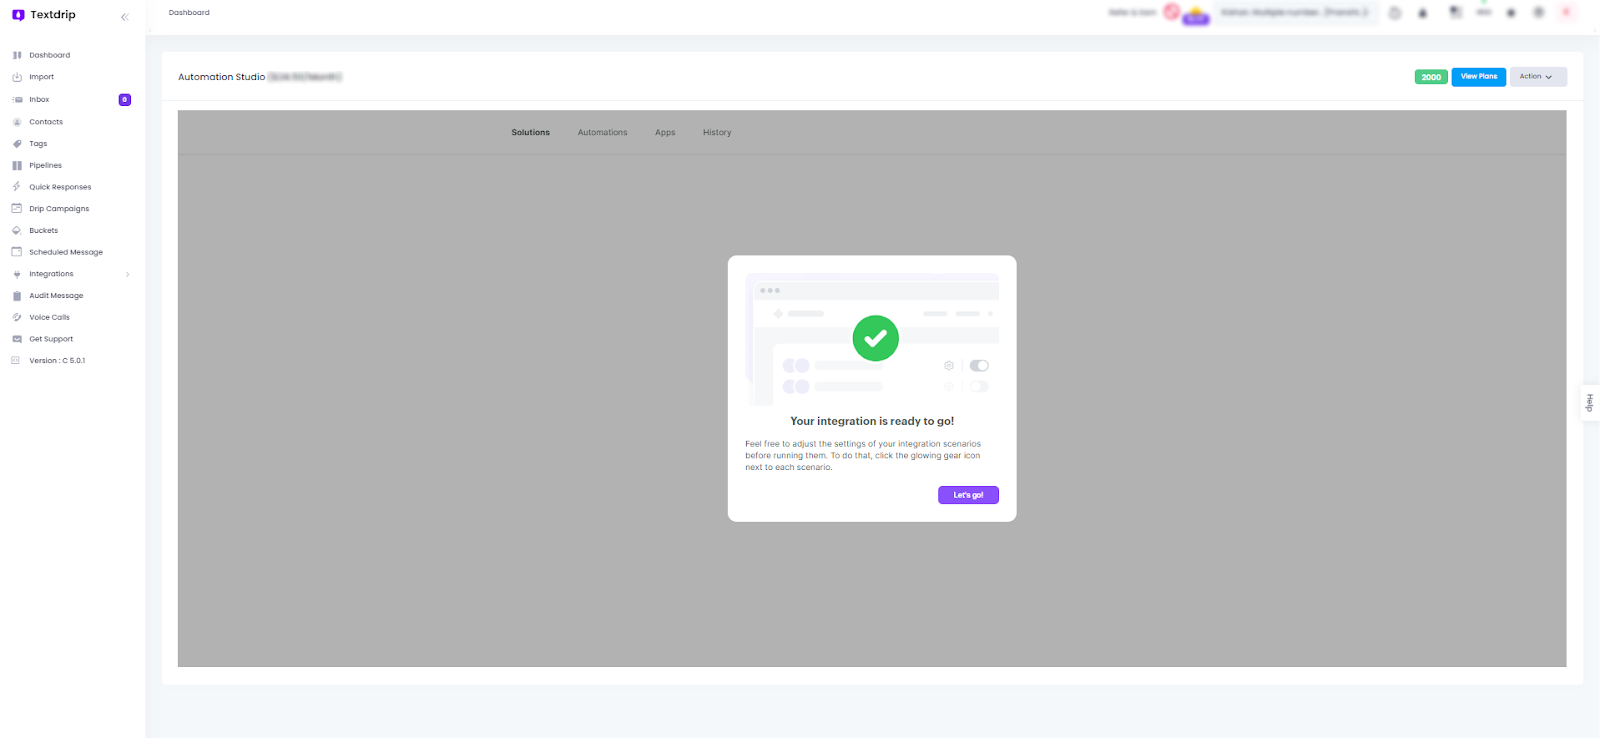
After granting access, another pop-up window will appear. Click on “Connect to Calendly” to complete the integration, which will enable Textdrip to manage your Calendly events and send automated SMS based on your setup.
Congratulations! You can now automate SMS notifications for appointment scheduling updates, reminders, and confirmations.
If you would like to learn more about it, you can visit this link.
Explore more content
Want to Generate
More Sales Opportunities?
Automate your text messaging hustle to generate more sales opportunities with Textdrip and watch your business grow.